Tuft Love
After posting this image on Facebook of our new Pup, Moxie…a few people commented on the headboard.
They were probably just surprised to see that we actually shelled out the moolah for an upholstered headboard. FOOLED-YA!That’s right…the total for this oh-so-gorgeous piece of art was $11.
Here’s how it all happened…I get a text message from my dear DIY genius friend Whitney…
W: You want an upholstered headboard, right?
Me: Yeah!
W: Ok…If I can fit it in my car, you can have it. It looks like something Don Draper owns.
Me: Ok cool!
…. 2 hours later
W: This really is a dangerous driving situation…I can hardly turn the steering wheel or move my arms with this blue beast in here…(see text photo below.)
(And for the record … I’m sure she was safely pulled over while she was texting…with an already dangerous headboard obstructing her sight and general movement, right Whit??
And then she pulled up to our house with this!
Heeellllloooo Nurse – that is quite the sight! First thought: Uhhh.. ‘scuse me..but I’m not putting that thing in our house!
But Whit was determined to help me turn this into a piece of artwork…it only took the jaws of life to get it out of her car.
Everything old is hip again, right? Didn’t the Draper’s start a blue upholstered Headboard revolution?? Ehh? No? Ok.
Mistake #1 : when we got it in the house… the piece looked larger than what I remember our bed looking. We later discovered that this was a KING headboard…that we were trying to recreate for a QUEEN bed. Woops!
Now keep in mind, none of us had any idea what we were doing…basically our guidelines were…
– Undo the existing upholstery step-by-step
– Document those steps so we would know how to put it back together
– Somehow turn a King into a Queen
–Dive right in and don’t think about it too much, your “master plan” will change as you go anyways
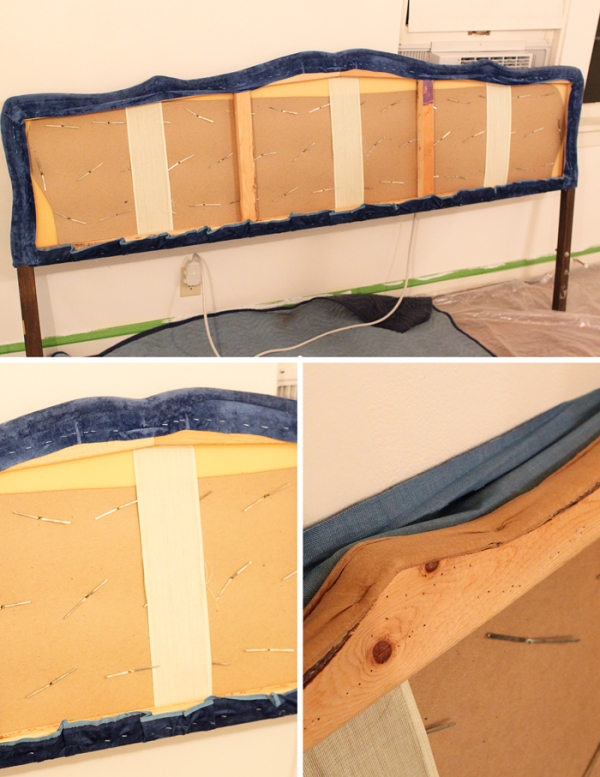
The construction is basically a wood structure at the core, foam stapled into the wood in the front and around the edges, fabric over the foam..with more staples, and finally the buttons pinned in the front, all the way through the back.
We started out by removing all the staples…and there were a lot of them! We removed the fabric from the whole frame, leaving the buttons the only thing holding it in.THen, one by one, we took out all the buttons on the back side – saving them for later! We had no idea what shape the foam would be..and that was the make or break factor…No matter how cheap I am…if that foam was gross..it was going back to the curb. Luckily it was in really good condition and easily reusable.
Now for the brain buster…how to turn a King headboard into a Queen. We didn’t want to loose any of the curved details or the rounded corner, so we decided to make 2 cuts and reattach the rounded side posts, further towards the center.
Here you can see where we reattached the nice rounded side posts.
I scored bit time on this fabric! It was exactly what I wanted, a thick upholstery fabric with a rough texture and a little bit of a shimmer – romantic but not froofy. This particular fabric happened to be on sale x 2!! It was $11 total for 2.5 years. SCORE!
Using the old fabric, we roughly measured and cut a pattern for the new board.
Mistake #2…cut a lot more fabric than you think
Next..the buttons. Oh how i loathed those buttons no other way to give the board that beautiful tufted look without them. They were all 1 piece and couldn’t be stripped of the fabric…So instead of taking away…we added it on top…with hot glue! Can’t get much easier than that. The final product was rough looking – i had doubts..but I knew once they were pulled tight into the foam, none of that would show.
After we had the fabric cut and buttons covered…we were ready to roll.
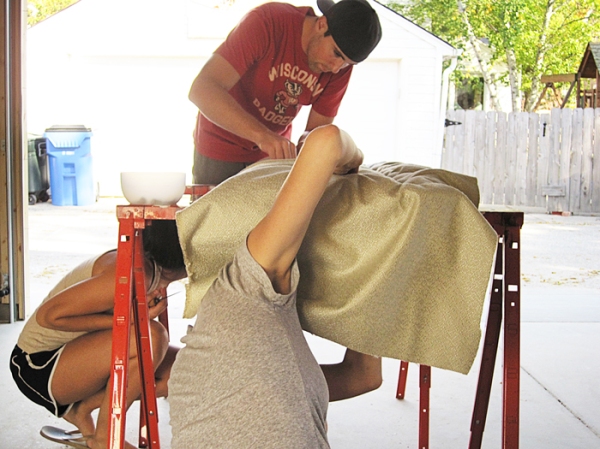
Put the board, foam up on two stands, and lay the fabric over it. All we had to do now was puncture the buttons through the fabric and into the back and staple around the edge..simple, no? NO!
We had to stick the metal buttons, through the thick fabric, right into the pre-drilled holes, through the foam, into the back and spread them apart to secure them –
– things got awkward with far too many “That’s What She Said” jokes …we are normally very mature adults…but getting those metal button pokers into the holes proved to be very difficult without being able to see anything.
Here is what the procedure looked like to us…
(psssst… look how good those button look now! Did you doubt them like I did?)
After all the buttons were secured, we flipped over the board and got crazy with the staple gun. This process took a team. We cut our fabric a little too short in some areas so we really had to pull as tight as possible. Lot of hands to hold and even more staples. Luckily we had a team of rockstars helping, thanks friends! For the curves and edges, we really just decided what to do when we got there, folded and stapled the extra fabric until it looked good.
Since the posts wouldn’t attach to our bed, we decided to mount the board onto the wall instead of our bed, using a french cleat, which are two different pieces of wood, one attached to the wall, one attached to the bed that interlock.
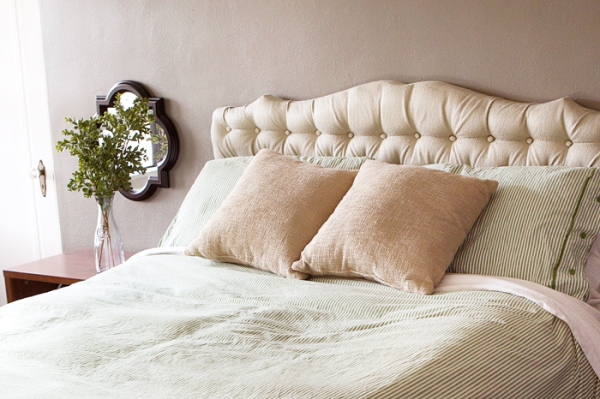
And here it is! Our brand-spankin’ {kinda} new, $11 headboard!
{Bedding: Ikea / Lamp & Mirrors: Target / Paint: Martha Stewart-Mushroom }
{Pssst!…check out Moxie’s modeling debut on my friend Nellie’s Holiday Photo Cards}


Love this but it looks like a tough project…glad you had helpers!!
Wow! I am SO impressed! It is GORGEOUS! And, thanks for the plug for my Holiday Cards! 😛 Moxie AND you & nick make the BEST models! 🙂
This is an amazing project!! Such an inspiration
Thanks Emily! Gotta love trash to treasure projects. Even from the curb on the south side..eeek!